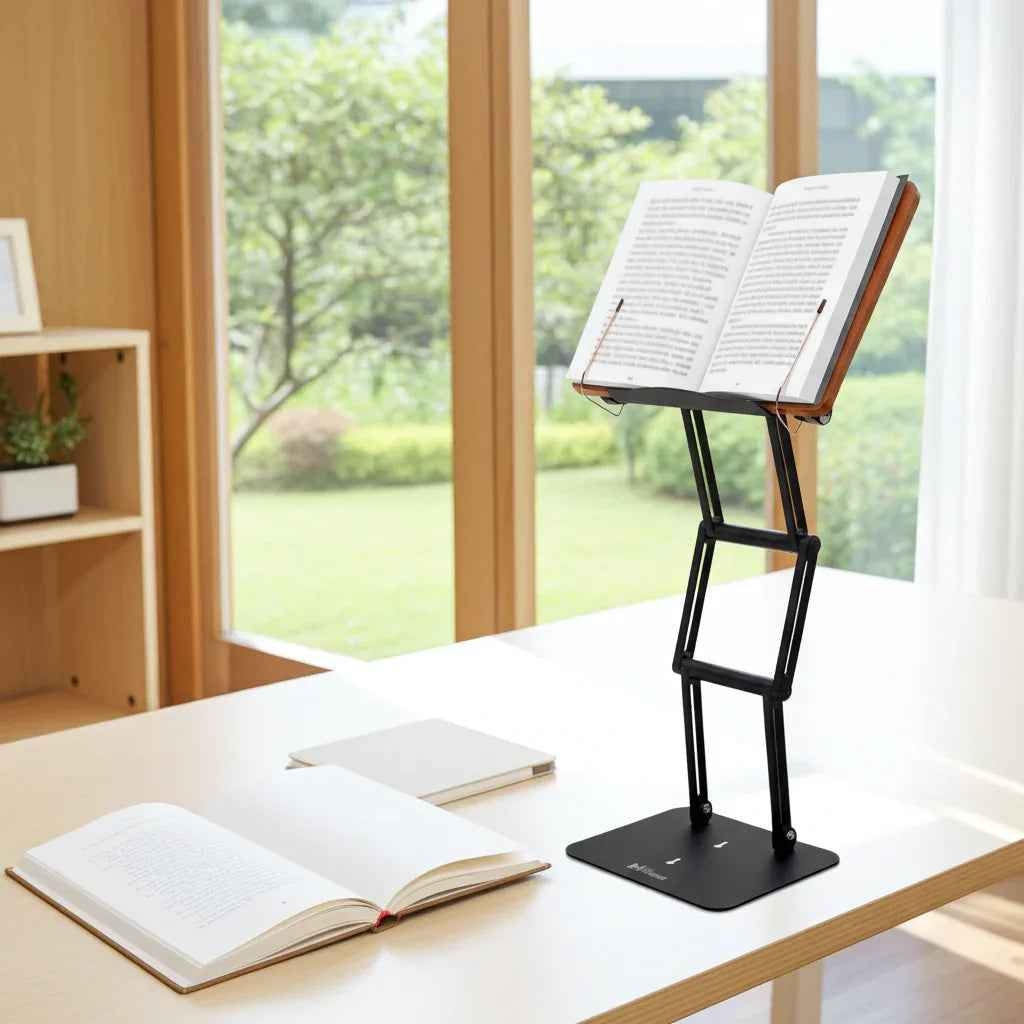
A long study session can turn a kitchen table into a neck-and-shoulder complaint factory. The problem is rarely a lack of discipline. More often, the book is flat, the screen is too low, the chair is doing its best impersonation of a folding ladder, and your body spends hours adapting to a workspace that was never designed for serious work. This guide to home study ergonomics will help you build a setup that supports concentration without asking your cervical spine to carry the entire project.
Start With the Reading Height, Not the Chair
Most home study setups fail at the same point: the material sits flat on the desk. That forces the head forward and down, especially when reading dense textbooks, legal documents, sacred texts, research papers, or handwritten notes. The farther the head drifts in front of the shoulders, the more the neck muscles must work to hold it there.
Bring the work closer to eye level. Whether you are using a book, laptop, tablet, or printed reading packet, the goal is to reduce repeated neck flexion while keeping your shoulders relaxed. Your gaze should generally land near the upper third of the screen or page, with a modest downward eye angle. You should not need to crane your neck upward, either. Ergonomics is not a contest to see how high you can place a screen.
A laptop creates a common compromise. Raising it improves viewing height but makes the keyboard too high for comfortable typing. If you type for substantial periods, pair an elevated laptop with an external keyboard and mouse. If you primarily read, review, attend lectures, or reference material, elevating the laptop can make an immediate difference.
For physical books, a stable adjustable stand is more than a convenience. It changes the geometry of study. Pages become easier to see, hands are freed for note-taking, and the neck is no longer bent toward the desktop for an entire chapter. This is the practical logic behind the traditional shtender: serious study deserves a raised platform.
Set Your Chair and Desk Around Your Body
Your chair does not need to be expensive to be useful, but it does need to let you sit with support and without excessive reaching. Start by placing both feet flat on the floor. If your feet dangle, use a firm footrest, a stable box, or a stack of books that will not slide. Unsupported feet often lead to sliding forward in the chair, which then pulls the low back out of its supported position.
Sit back far enough to use the chair’s backrest. A small amount of lumbar support is helpful, but avoid turning the setup into a construction project. A rolled towel placed at the curve of the lower back can be enough when a chair offers little support.
Your elbows should rest near your sides when typing or writing, usually around a 90-to-110-degree bend. Wrists should stay relatively straight rather than sharply bent upward. If your desk is too high, raising the chair may solve the elbow issue while creating a foot-support issue. That is why a footrest is often the missing piece of an otherwise workable setup.
Desk depth matters as well. Place the screen or reading stand far enough away that you are not leaning back to focus, but close enough that you are not reaching your head toward it. For many adults, a screen about an arm’s length away is a useful starting point. Smaller text may require a slightly closer distance, but increase font size first when possible. Squinting and forward-head posture are poor study partners.
Build a Reading and Writing Workflow
Home study often involves switching among a textbook, a laptop, notes, and a phone. Each switch creates an opportunity to twist, reach, or collapse forward. Arrange your most-used items in the area directly in front of you. Materials used occasionally can sit to the side.
If you read from a physical book and take notes by hand, place the book on a raised stand and keep the notebook low and close. This allows you to glance between them without repeatedly dropping your chin to the desk. If you write for long stretches, lower the book or screen slightly rather than forcing the writing surface too high. The best position depends on the task.
That distinction matters. There is no single perfect height for reading, typing, handwriting, video calls, and standing work. A fixed setup can be acceptable for a short task, but long sessions benefit from adjustability. Move the work to fit the task instead of asking your body to accommodate every task at one awkward level.
A substantial stand also matters when the material is substantial. Thin tablet stands are fine until you place a large textbook, a reference volume, or a laptop on them. Then the wobble begins, the viewing angle shifts, and your expensive ergonomic improvement turns into a balancing act. For serious readers, stability is a health feature as much as a quality feature.
Use Light That Lets You Read Without Leaning
Poor lighting encourages bad posture because people instinctively lean closer to what they cannot see clearly. Position your work so that daylight comes from the side rather than directly behind the screen or directly into your eyes. Then add a desk lamp or room lighting that illuminates the page without creating harsh glare.
For paper, aim light across the page from the side opposite your writing hand to reduce shadows. For screens, reduce glare before increasing brightness. Adjust the screen angle, move the lamp, or close a blind if necessary. A screen at maximum brightness in a dark room is not a productivity upgrade.
Text size is part of ergonomics too. Enlarging digital text can reduce the urge to lean forward, particularly during late-night reading when eyes are tired. There is no prize for reading tiny type from too far away.
Change Position Before Discomfort Makes the Decision
Even an excellent setup is not a permission slip to remain motionless for four hours. The body generally tolerates movement better than prolonged static posture. Sitting upright is useful, but sitting upright without moving eventually becomes just another static load.
Use natural breaks in your work. At the end of a problem set, section, page range, or lecture module, stand up, walk briefly, refill water, or look across the room. You do not need a dramatic exercise routine between every paragraph. You do need enough movement that your shoulders, hips, and eyes are not locked into one position all afternoon.
A practical rhythm is to work in focused blocks of 30 to 60 minutes and take a short movement break afterward. If you lose yourself in deep study, set a quiet reminder. Scholars have always known that learning requires endurance. Modern ergonomics simply recognizes that endurance is easier when your body is not fighting the furniture.
Moderate standing can also be useful, especially for reading, reviewing notes, or watching a lecture. It is not automatically better than sitting, and standing all day can create its own fatigue. Alternate rather than convert. A height-adjustable platform makes that transition far more realistic because the reading surface can follow you from seated work to a brief standing session.
The Home Study Ergonomics Checklist
Before beginning a longer session, take 30 seconds to check the basics:
- Your book or screen is high enough to avoid sustained downward neck bending.
- Your feet are supported, and your lower back has contact with the chair.
- Your shoulders are relaxed rather than lifted toward your ears.
- Your keyboard, notebook, and mouse are close enough to avoid reaching.
- Your lighting lets you read clearly without glare or squinting.
- You have a plan to stand and move before discomfort becomes the alarm.
Invest Where the Setup Carries the Most Load
If you are studying casually once a week, an improvised setup may be enough. If you are preparing for exams, conducting research, working from home, learning religious texts, or spending hours with dense material, the equipment carries a different responsibility. Flimsy accessories and flat reading surfaces create small strains that accumulate through repetition.
A serious study stand should hold its position, support real weight, and provide enough elevation for both seated and moderate standing use. The Stander 1.1 is designed around that standard, raising books, laptops, and tablets up to 17.8 inches above the tabletop to support a more natural viewing height. Its aluminum construction and stainless steel joints are built for users who place demanding academic volumes, devices, or both on the same platform.
The larger point is not that every desk needs more gear. It is that the tools closest to your eyes and hands deserve careful selection. A stable, adjustable reading surface can improve the way the entire workstation functions, from posture to desk organization to the simple willingness to sit down and begin.
Set up your space so that your attention goes to the material, not to the ache building between your shoulders. Good study is demanding enough. Your workstation should carry its share of the work.