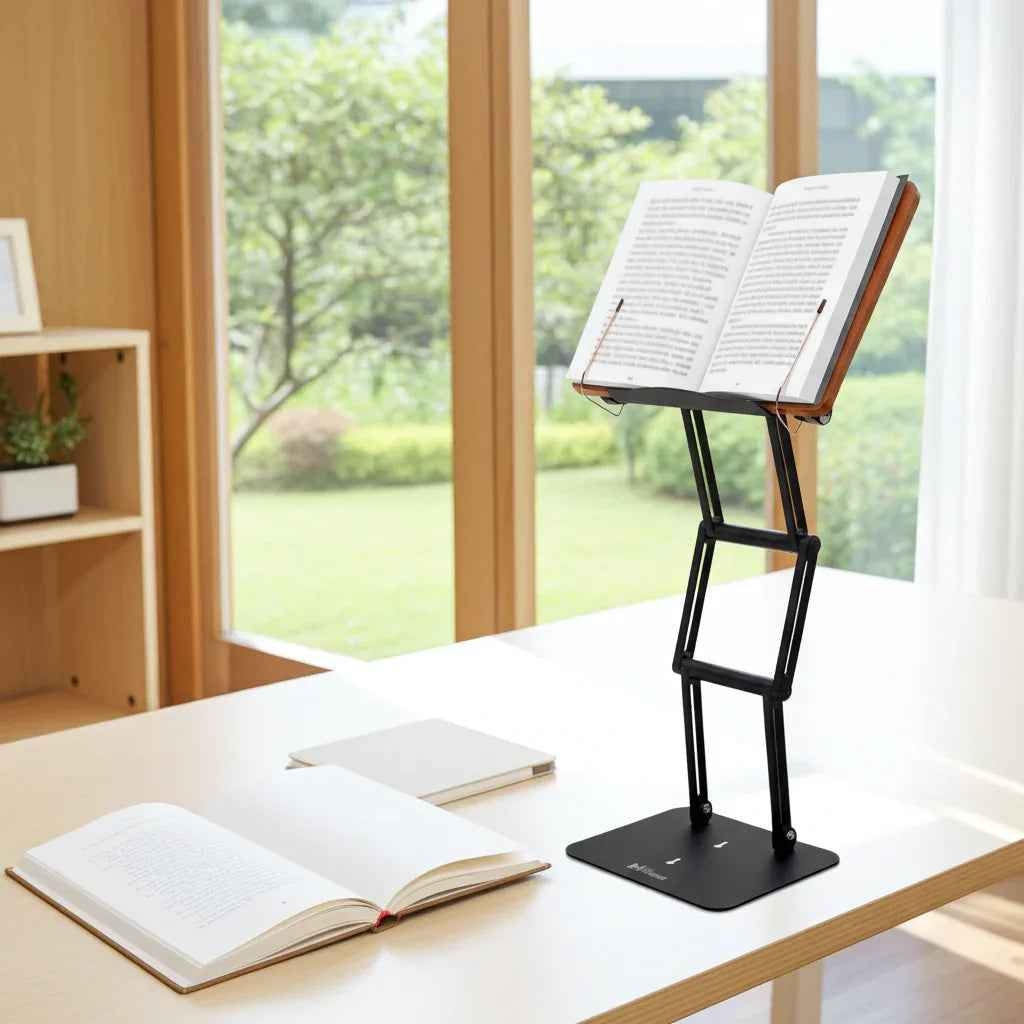
A laptop set flat on a desk asks your neck to do too much work. The screen sits low, your chin gradually drops, and an hour of concentrated writing can become an afternoon of stiff shoulders and a cranky cervical spine. This guide to choosing laptop elevation starts with a simple principle: raise the screen for your eyes, then arrange the keyboard for your hands.
That sounds obvious. It is also where many desk setups go wrong. A laptop is both a screen and a keyboard joined in one compact device. Elevating it improves your viewing angle, but it can put the built-in keyboard too high for comfortable typing. The right solution depends on how long you work, whether you use an external keyboard, your body proportions, and whether you need a setup that can move from seated study to standing work.
Why Laptop Elevation Changes Your Posture
When the screen is too low, people compensate without noticing. They bend at the neck, round the upper back, lean forward, or slide down in the chair. None of these positions feels dramatic at minute five. After several chapters, meetings, or research sessions, however, the accumulated strain becomes difficult to ignore.
A properly elevated laptop brings the display closer to your natural line of sight. Your head can remain more balanced over your torso rather than drifting forward toward the screen. That reduces the tendency to crane downward and makes it easier to maintain an upright, supported seated posture.
Elevation is not a magic cure for every form of discomfort. Chair height, desk height, screen distance, lighting, vision needs, workload, and movement habits all matter. But screen height is one of the most direct improvements available to anyone who reads, studies, writes, researches, or attends video calls for hours at a time.
Guide to Choosing Laptop Elevation: Start With Your Eyes
Your screen should generally place the top portion of the display at or slightly below eye level when you are sitting upright. The ideal position is not a rigid measurement because users have different heights, glasses prescriptions, chairs, desks, and laptop sizes. Still, the goal is consistent: you should look forward or slightly downward at the screen, not sharply down into your lap.
Settle into your normal working posture before measuring anything. Sit back in your chair with your feet supported and your shoulders relaxed. Then look straight ahead. That natural gaze line gives you a useful reference point for the upper area of your display.
For many users, a modest riser is enough for occasional email or short tasks. Serious desk work often calls for more range. A stand that can elevate a laptop significantly gives you room to adapt the setup to your body, chair, and task rather than accepting the one height a basic accessory happens to offer.
Screen distance matters too. Place the laptop far enough away that you are not leaning forward to read, usually around an arm's length away, then adjust based on text size and visual comfort. If you find yourself squinting, do not solve the problem by pulling the screen close and hunching toward it. Increase text size, improve lighting, or reassess your vision needs.
The keyboard trade-off you should not ignore
Here is the rule that separates a genuinely ergonomic setup from a tall laptop balanced on a pile of books: if you raise the laptop screen for extended typing, use an external keyboard and mouse.
Your hands should be able to type with relaxed shoulders, elbows comfortably bent, and wrists in a neutral position. Once a laptop is elevated to eye level, its attached keyboard is normally too high to use well for long periods. Reaching upward to type defeats much of the postural benefit created by raising the screen.
For brief use, such as checking a document, following a recipe, joining a video call, or reading a few pages, you may use the laptop keyboard at a lower elevation. For sustained writing, coding, analysis, coursework, or professional work, separate the screen from the typing surface. It is the more serious setup, and serious work deserves it.
Choose Height Range, Not Just a Single Height
A fixed laptop riser can be useful if one desk, one chair, and one user define your entire workday. Most people do not have that luxury. They move between tasks, share workspaces, change chairs, use different devices, and sometimes want to stand for part of the day.
An adjustable stand gives you a practical range rather than a compromise. Lower it for a seated session with a laptop keyboard, raise it for external-keyboard work, or bring reading material closer to eye level during deep study. This flexibility is especially valuable when one surface must serve as a workstation, textbook holder, tablet stand, and reading platform.
For users who want a true transition from seated to moderate standing work, maximum elevation becomes more than a specification on a product page. It determines whether the screen can actually reach a useful visual height. A platform that raises its support lip 17.8 inches above the tabletop, for example, can place the screen substantially higher depending on the laptop's dimensions. That creates meaningful room for seated and standing adjustment rather than offering a token lift.
Do not confuse a high stand with a stable stand. The taller the elevation, the more important the frame, joints, base, and adjustment mechanism become. A wobbly screen is distracting during typing and intolerable during video calls. It also encourages users to grab, brace, and reposition the device instead of focusing on the work in front of them.
Match the Stand to the Work You Actually Do
Laptop elevation should support your real workflow, not an idealized desk photo. A student switching between a laptop and heavy textbooks needs different capacity than someone who only watches occasional videos. A legal researcher may need a laptop beside a large reference volume. A religious scholar may want a modern shtender that holds sacred texts at a respectful, readable height and then supports a tablet or laptop for notes.
Consider these practical questions before choosing a stand:
- Can it safely support your laptop's size and weight without flexing or shifting?
- Does the platform hold the device securely at a steep reading angle?
- Is the base substantial enough for long typing, tapping, and page-turning sessions?
- Can the stand accommodate books, tablets, and documents when your laptop is not on it?
- Does the adjustment mechanism feel durable enough for daily use rather than occasional display duty?
The Stander 1.1 was built around that more demanding use case. It is a heavy-duty adjustable utility stand designed for laptops, books, tablets, and substantial texts, not just casual scrolling. Its high elevation range allows the same platform to serve a desk worker, reader, student, cook, musician, or scholar who needs a stable surface at the correct height.
Set Up Your Elevated Laptop Without Creating New Problems
Once you have a stand, take five minutes to set it correctly. Begin with the chair and desk, not the stand. Adjust your chair so your feet are supported and your elbows can rest near desk level. Then raise the laptop screen until the upper portion of the display meets your comfortable gaze line.
Place an external keyboard directly in front of you when you plan to type for more than a short session. Keep the mouse close enough that your arm does not reach outward all day. Center the primary screen in front of your body rather than twisting your neck toward it. If you use a second display, position the screen you use most often in the center.
Angle the laptop display to minimize glare, but avoid tilting it so far that you must lower your chin again. A small adjustment can make a surprising difference. Good lighting helps as well. When a screen is washed out by a window or overhead reflection, people tend to lean forward, strain their eyes, and abandon otherwise sound posture.
Standing deserves the same care. Raise the screen so you are not looking down, and use a keyboard height that allows relaxed shoulders. Standing all day is not automatically better than sitting all day. Alternating positions, taking brief movement breaks, and avoiding prolonged awkward angles is usually the more sustainable approach.
Do Not Let “Portable” Mean “Temporary Posture”
Many people accept poor laptop posture because they work in several places: a home office, library, classroom, kitchen, clinic, or shared workplace. Portability matters, but it should not require living with a screen at chest height. A well-built adjustable stand can make a temporary desk feel far more intentional.
For reading-intensive work, laptop elevation also creates a cleaner mental boundary. The display is where your eyes expect it to be. The keyboard and notes sit where your hands can reach them. Your body is not constantly negotiating with the furniture. That leaves more attention for the paper, the client, the lecture, the argument, or the page of text in front of you.
Your laptop is already capable of serious work. Give it a height that allows you to do the same.