A student can spend three hours preparing for an exam without noticing a problem, then stand up with a stiff neck, rounded shoulders, and the distinct feeling that their spine has filed a complaint. The most useful student posture examples are not picture-perfect poses held for hours. They are workable positions that keep the head, shoulders, back, and study materials in better alignment while serious work gets done.
Good posture is not about sitting rigidly or forcing your shoulders into an unnatural military stance. It is about reducing the unnecessary strain created when you repeatedly look down, hunch forward, twist toward a screen, or reach too far for the materials that matter. For students, researchers, and scholars who work with heavy books as well as devices, the setup matters as much as the chair.
Student Posture Examples for Real Study Sessions
1. The supported seated reading posture
This is the baseline position for reading a textbook, printed article, or study packet at a desk. Sit far enough back that your lower back is supported by the chair. Place both feet flat on the floor or on a stable footrest, with your knees roughly level with your hips. Let your shoulders settle rather than pulling them forcefully backward.
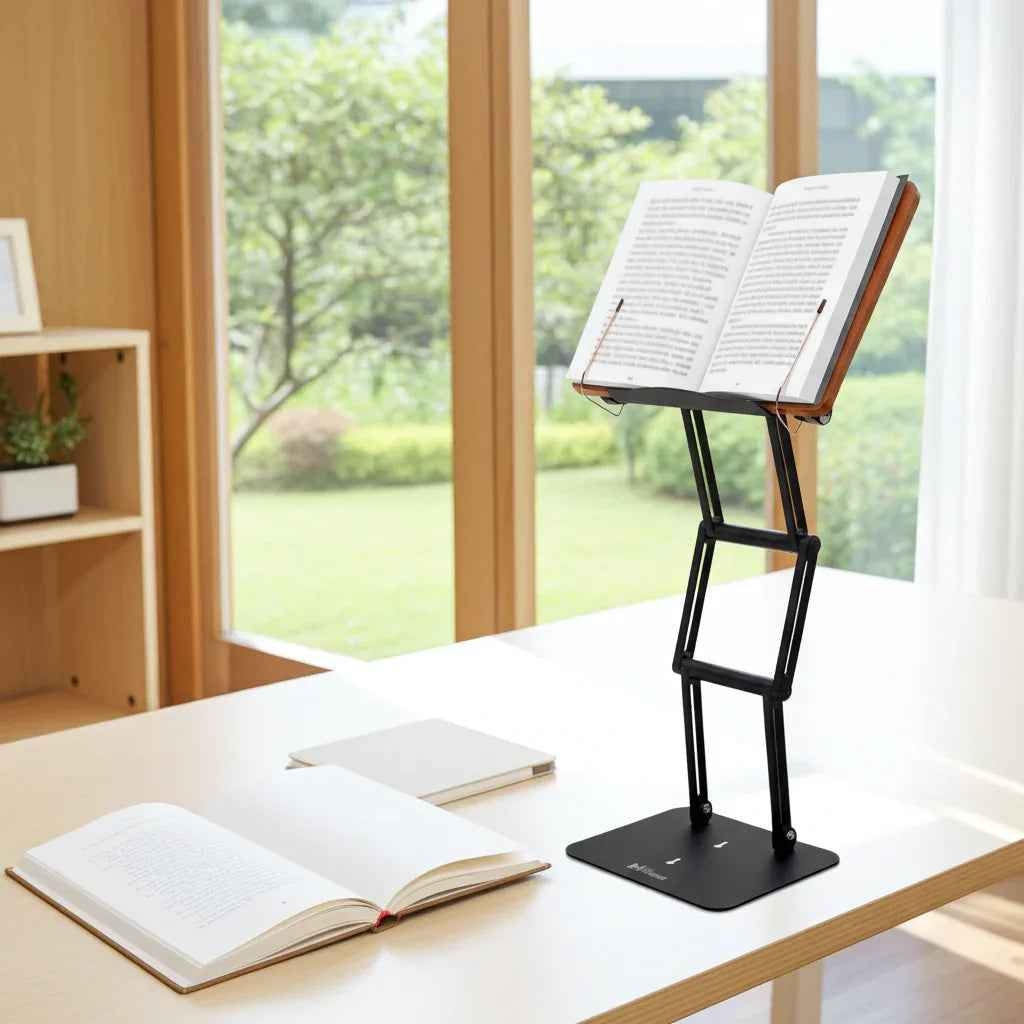
The key adjustment is the reading material. A book laid flat on a desk asks your neck to bend forward for every line. Raise the book and angle it toward you so the top portion is closer to eye level. Your eyes should move more than your neck. If you need to lower your chin sharply to see the page, the material is still too low.
This posture works well for shorter reading sessions and note review. For a dense chemistry text, legal casebook, or large religious volume, stability is nonnegotiable. A wobbly stand may be tolerable for a tablet, but it becomes a distraction when you are turning pages in a substantial book.
2. The upright laptop posture
The familiar laptop hunch begins with a design compromise: the screen and keyboard are attached. If the keyboard is at a comfortable height, the screen is usually too low. If the screen is raised, the keyboard may be too high for comfortable typing.
For longer laptop sessions, elevate the screen so your gaze lands near the upper third of the display without dropping your head. Then use an external keyboard and mouse whenever possible. Keep your elbows near your sides and your forearms close to level with the desk. The goal is not to freeze in place. It is to stop your head from migrating forward toward the screen as concentration increases.
A raised laptop setup is especially useful for writing papers, coding, online lectures, and research. The trade-off is desk space. External input devices take room, but they often buy back comfort and concentration during the final stretch of a long assignment.
3. The active note-taking posture
Taking notes requires a different arrangement than reading. You need to see source material, write comfortably, and avoid the side-to-side twisting that develops when a book is on one side and a notebook is on the other.
Place your primary source directly in front of you or slightly to the side of your writing hand. Raise the source material, then position your notebook close enough that you do not have to reach forward with your arm. A slight forward lean while writing is normal. The problem begins when that lean becomes a sustained collapse through the upper back and neck.
Use short resets between sections. Put the pen down, sit back against the chair, and let your eyes look across the room for a few seconds. This is not lost study time. It is a simple way to interrupt the posture drift that occurs when you are focused on getting every detail right.
4. The standing study posture
Standing can be an excellent change of position during a long study block, but standing is not automatically ergonomic. A student who stands with a book on a low counter will simply recreate the same neck flexion from a different altitude.
Set the reading surface high enough that you can read without folding your head down. Keep your weight balanced between both feet and avoid locking your knees. You may shift your stance, rest one foot briefly on a low support, or take a few steps between pages. Moderate movement is part of a good standing workflow.
Standing is particularly effective for review sessions, flashcards, reading commentary, or working through material aloud. It may be less practical for detailed handwriting or prolonged keyboard work unless your desk and input devices are arranged for it. The point is variation, not proving that you can stand longer than everyone else in the library.
5. The dual-material study posture
Many students work from two sources at once: a laptop and textbook, lecture slides and handwritten notes, or a primary text and commentary. Without planning, the neck becomes a windshield wiper, rotating and dropping thousands of times through the session.
Choose one material as the primary visual target and center it. Place the secondary material close beside it, raised as much as practical. If you use a monitor, keep the book or tablet near the monitor rather than flat on the desk. This reduces repeated head rotation and makes it easier to stay visually organized.
For serious multi-source work, an adjustable stand earns its place. The Stander 1.1 can raise a book, laptop, or tablet up to 17.8 inches above the tabletop at its supporting lip, helping users position substantial academic or religious texts for both seated and moderate standing study. Its aluminum build and stainless steel joints are designed for the kind of materials that make ordinary tablet stands surrender without ceremony.
6. The lecture and tablet posture
Watching a lecture on a tablet from the couch, bed, or floor may feel casual, but it often produces the most extreme neck angles of the day. The device ends up in the lap, the student cranes downward, and an hour passes before anyone notices.
If you are using a tablet for class, place it on a stable surface and elevate it. Sit with back support when possible, and bring the device toward your eye line instead of bringing your face down to the device. If the lecture requires typing, use a keyboard rather than balancing the tablet in your hands.
There are times when a relaxed posture is fine. Watching a short video in bed is not a moral failure. But it should not become the default for lectures, exam review, or nightly reading. Your body learns from the positions you repeat.
7. The reset posture between study blocks
Even a well-arranged desk cannot make a human body thrive in one position indefinitely. The best posture is often the next reasonable posture. Every 30 to 60 minutes, change something: stand, walk for a minute, roll your shoulders, or look away from the near work in front of you.
A reset does not need to become an elaborate mobility routine. The objective is to restore movement after sustained concentration. Students frequently wait until discomfort becomes loud before adjusting. A better strategy is to make position changes part of the study plan, like checking citations or refilling water.
What Good Student Posture Actually Feels Like
Good study posture should feel supported, not tense. Your jaw is not clenched. Your shoulders are not working to hold themselves in place. Your eyes can move across the page or screen without your neck constantly leading the motion. You can breathe normally, reach your materials without stretching, and stay focused on the work rather than negotiating with discomfort.
If you have existing pain, numbness, weakness, recurring headaches, or symptoms that do not improve with basic workspace changes, seek guidance from a qualified healthcare professional. Ergonomic adjustments can reduce avoidable strain, but they are not a substitute for evaluation when symptoms persist.
Your study setup should serve the work in front of you, whether that is an organic chemistry chapter, a dissertation draft, a legal brief, or a sacred text studied with care. Raise what you read, support how you sit or stand, and give your neck fewer reasons to work overtime.